I have the Power(query): using Power Query to call REST APIs

Welcome to “I Have the Power(query)” – a new intermittent series here on the Burningsuit blog, delving into some of the more advanced use cases of Power Query, the oft-overlooked and sometimes maligned ETL engine for Power BI. Today, we’re looking at APIs.
There are a whole host of web services available that can do all sorts of things with your data; from predicting the age, gender, or nationality of someone from their name (agify.io, nationalize.io, genderize.io), to getting pictures of dogs (dog.ceo/dog-api), web services exist to provide all sorts of data that you can use in your projects. Many of these web services provide access through an API (specifically, an API that implements the REST architecture). But how can I call a RESTful API from within Power Query and how can I do that in a way that is robust and re-useable? This blog post looks to demonstrate that.
Primer: APIs? REST!?
If you need a primer, an API is an Application-Program Interface and provides a route for two pieces of software (in this case Power Query and some web service) to pass messages back and forth. Many web service APIs adhere to the REST architecture, which implements access through URLs – these look like regular web addresses but provide the ability to pass input through that URL and receive output based on that input (usually in the form of a JSON file).
We can use Power Query to call these APIs and use our data as input. To demonstrate this, I am going to use Google’s Translate API (for which the base URL is https://translate.googleapis.com/translate_a/single). This allows us to translate text from one language to another, providing our input text, source language, and destination language as parameters inside our URL. You can test this API without having to dip into Power Query by entering the following URL into your browser: https://translate.googleapis.com/translate_a/single?client=gtx&dt=t&sl=en&tl=fr&q=hello . This should cause a file to be downloaded called json.txt which contains the results of the translation (in this case, translating ‘hello’ from English to French). SO how does this URL work and how can I do this in Power Query? Let’s crack on:
Calling an API through Custom Columns
Having opened the Power Query editor, I’m going to start with fairly standard sample data:
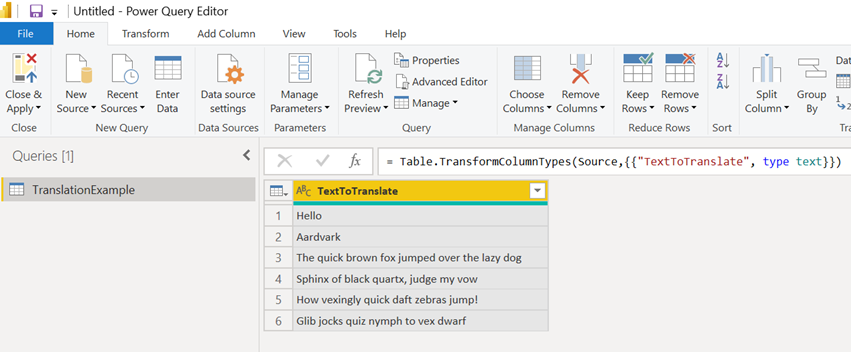
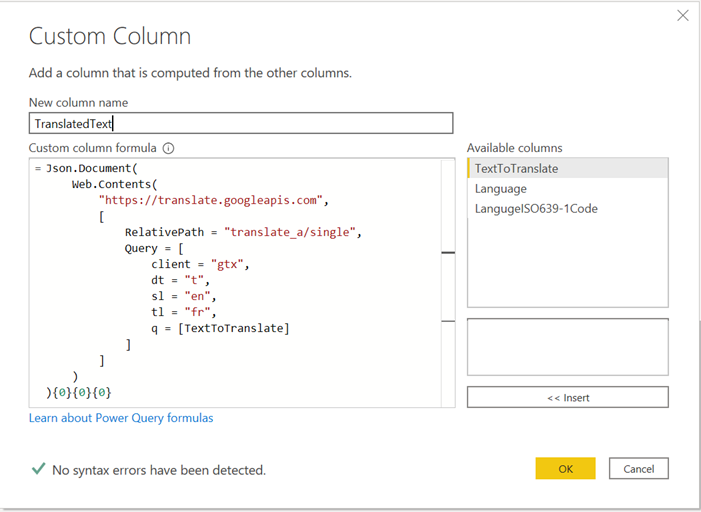
We can now add a Custom Column (via the Custom Column button under the Add Column tab), and generate some M code that will ‘call’ the Google Translate API using our TextToTranslate column as an input and store whatever is returned by the API in a new column (which I’m going t0 call TranslatedText)
Here’s the M code if you want to copy and paste:
Web.Contents(“https://translate.googleapis.com/translate_a/single?client=gtx&dt=t&sl=…” & [TextToTranslate])
So your Custom Column dialog box will look something like this:
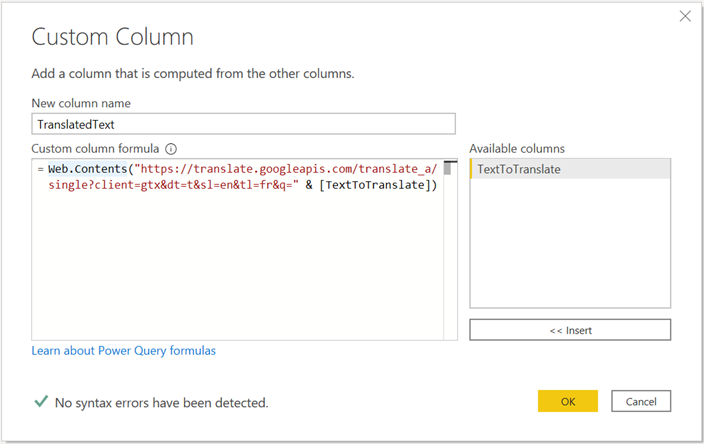
What’s going on here then? We’re using the Web.Contents M function to get the content from a URL (exactly as we would if we were pulling data from a regular web page), but we’re concatenating (via the & operator) the data in our TextToTranslate column onto the end of the URL (after the “&q=” in the URL).
What exactly is going on with this URL?
- Everything left of the “?” is called the ‘base URL’ and defines which API we’re calling
-
Everything right of the “?” is the ‘query’ and consists of a collection of key-value pairs separated by ampersands
- We can ignore client and dt key-value pairs – whilst they have no bearing on the output, they are essential to have the call function.
-
The “sl=en” key-value pair defines the “source language” – i.e. what language is our source text in?
- Here, we’ve hardcoded it to “en” for English
-
The “tl=fr” pair defines the “target language” – i.e. what language to we want to translate to?
- Again, it’s hardcoded here to “fr” for French
- q = is for the query text. In this case, we’re making use of M’s string concatenation via the ampersand to concatenate in the values in our TextToTranslate column
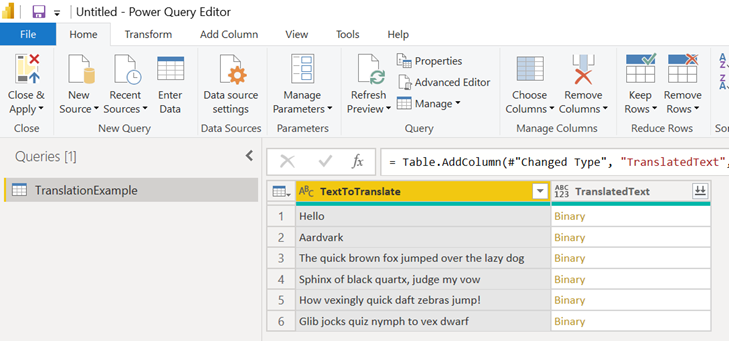
Once we hit ‘OK’, Power Query is going to make a call to the API for each row in our TextToTranslate column. If you tested out the URL from the intro, you’ll know that this results in receiving a JSON file in return and that our translation is inside that JSON file. Therefore, our next step has to be getting that translation out of the JSON file.
We start here, where Power Query has told us that it has some kind of Binary data for each row:
By double-clicking on the Binary entry and following down the top-level entry in each subsequent level, we eventually end up at:
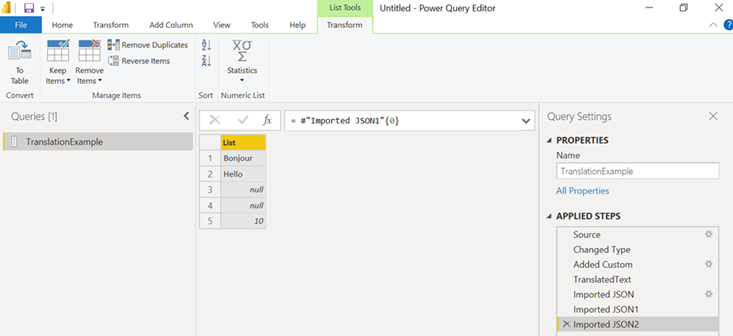
This shows that our translation (the ‘Bonjour’ above) is the first entry in the first entry in the first entry of our JSON file. To index that, it’s the 0th element of the 0th element of the 0th element in the JSON (remembering that Power Query uses zero-based numbering). Now that we know where our translation is, we can use M’s Json.Document function to tell Power Query that the data returned from our call is JSON, and then we can access our translation using the correct indexing.
To do this in our Custom Column, we want to wrap the Web.Contents line in Json.Document(){0}{0}{0} in order to index out the translation:

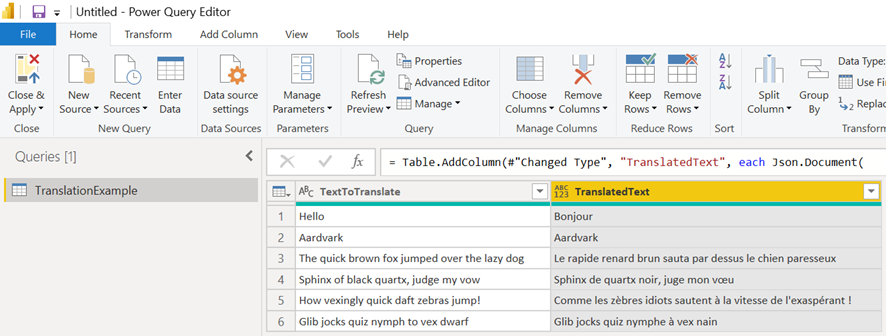
Et voila – we have English to French translation:
Getting argumentative
In the example above, you might think that the URL we’re providing to Web.Contents is pretty ugly; it’s hard to read, and it’s even harder to understand what our key-value pairs in the query are set to. Thankfully, Web.Contents provides us a different way to define the URL and the key-value pairs that makes everything a little easier. The documentation tells us that we can define part of our URL and our query key-value pairs by passing an additional set of arguments. Read the documentation if you want to understand exactly what this is doing, but what it means is that we can turn that ugly URL into the following instead:
Going further
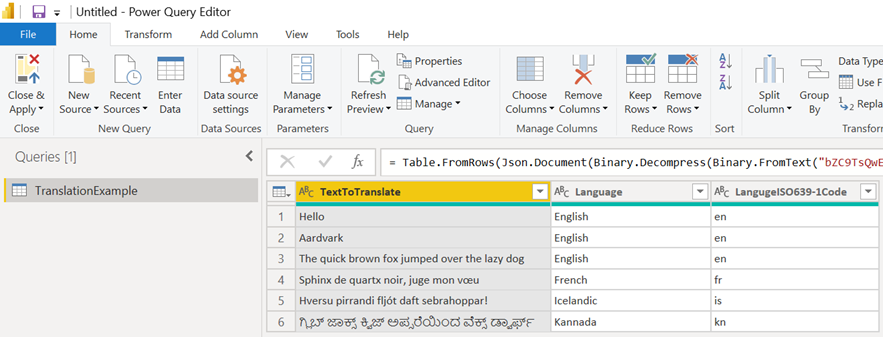
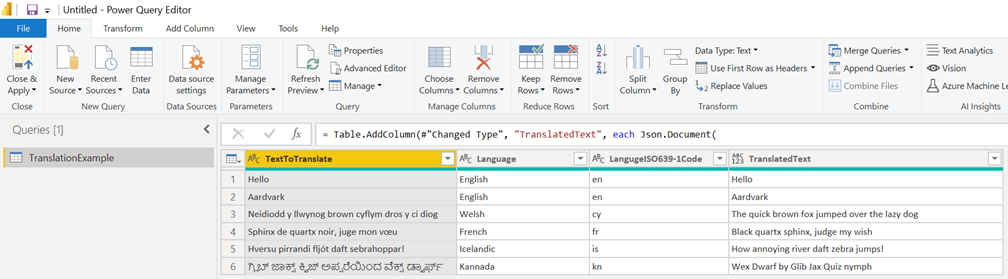
The above approach gets us to having a Custom Column that will contain an English-to-French translation of the contents of each row in our source column. But what if we want to be more specific about what translation is occurring? What if our data looked like the following, containing text in a variety of languages, along with the ‘from’ and ‘to’ languages in ISO639-1 code?
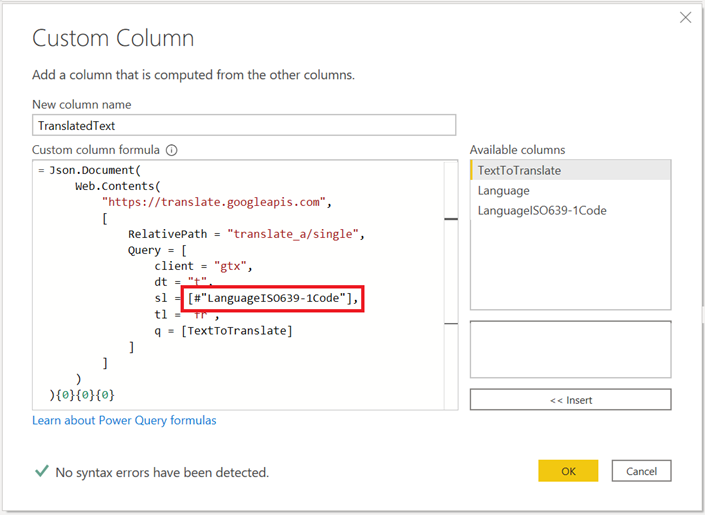
We can use our knowledge of the URL – we know that the “sl=” key-value pair of the query defines the source language and we can look at the documentation for the API to learn that the language has to be referred to by its ISO639-1 code (which we conveniently have in our data). As such, we can insert a reference to the “LanguageISO639-1” column into the set of query arguments in the Web.Contents function:
This allows us to translate from a variety of input languages into a single output language:
If we also had a column with the ISO code for the destination language, then we could follow the same process of inserting a reference to the column to have the custom column be a translation from many languages to many languages
Parameterisation
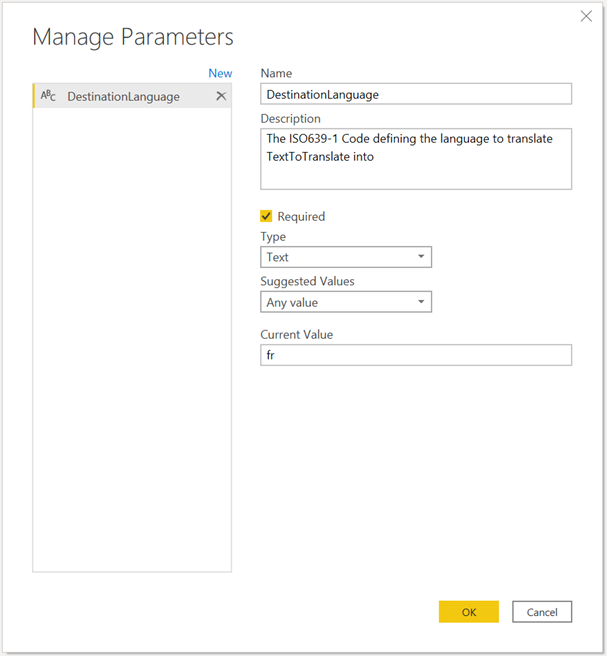
What if I want to be able to have a destination language that I could change easily without having to edit the M code used to generate the custom column? What if I also wanted to be able to change the destination language from within PowerBI without having to go back into the Power Query editor? The best way to achieve this is with a Power Query Parameter.
We create these via the Home tab, Manage Parameters -> New Parameter. We want to create a new parameter that looks like the following:
We can then update the code to create our custom column, and using the same & process as before (but noting that referencing parameters is done with their bare name):

Now the text in our TranslateText column will be the language whose ISO code is defined in the DestinationLanguage parameter. Having this set as a parameter, we can change it from within PowerBI, allowing us to change the destination translation language on the fly (although we do have to refresh the data to do so, at least we don’t have to open Power Query Editor):

So what?
In this blog post we’ve seen how to call a web service that uses a RESTful API in order to enrich our data through Power Query. Being able to query an API with your data through Power Query opens up a whole world of reporting options in Power BI – mashing your data against data provided by an API and then bringing that all into Power BI can allow you to derive insights you might otherwise not be able to. In a future blog post, I’ll dip into creating functions in Power Query and also demonstrate how we can call APIs that require some kind of authorisation, as open APIs (like the Google Translate API above) are fairly rare and often provide only a limited access to the web service.
If you’re interested in learning more about Power Query (especially in the context of Power BI), we cover both fundamental and more advanced aspects of Power Query in our Power BI Fundamentals and Power BI Advanced courses – or if you have a specific Power Query question you’d like answered, please reach out either via the comments on this blog post, or email to info@burningsuit.co.uk.
Add new comment